How to use the I2C LCD 1602 with the Raspberry Pi
In this tutorial, I will be showing you how to use the I2C LCD 1602 on the Raspberry Pi with Python to display data and also custom characters. To use I2C you will need to enable it. Please do this before continuing with the rest of the tutorial!
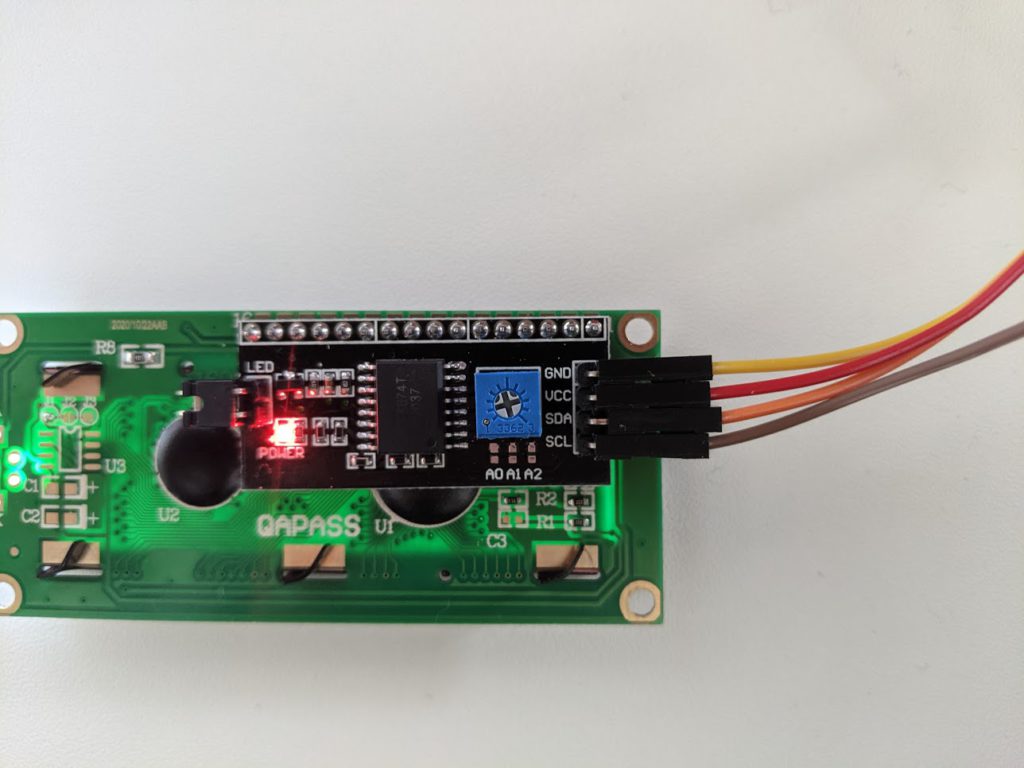
LCD 1602 uses a protocol called I2C. I2C (inter-integrated circuit) is a low-speed serial communication protocol. It has two wires SDA and SCL. Data is sent bit by bit across the SDA line while a clock pulses on the SCL line. The clock speed is controlled by the main controller. I2C can support multiple peripherals with unique addresses. Below I will show you how to connect the SDA and SCL to interface with the Raspberry Pi I2C controller
Wiring up the I2C LCD 1602 to the GPIO.
You will need 4 wires to wire up this component. 5.5, GND, SDA1, and SCL1. These wires should be plugged into the 4 corresponding pins highlighted by the green box below:
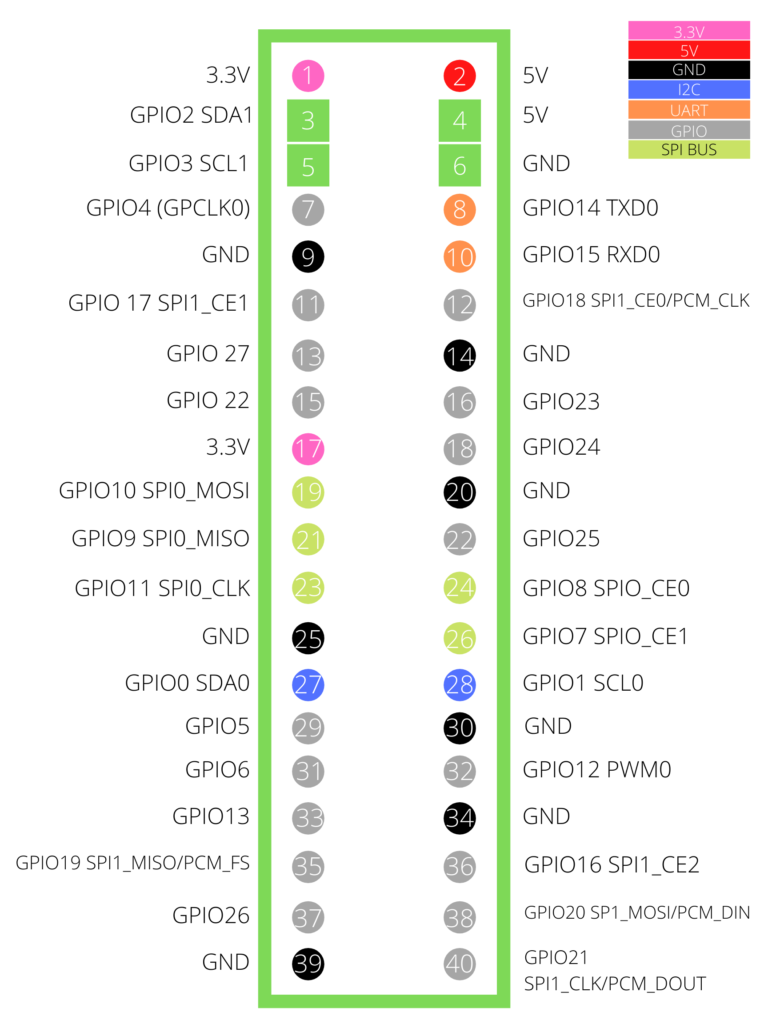
Now plug the corresponding wires directly into the I2C controller:
- Pin 4 (5V) connects to VCC
- Pin 6 (GND) connects to GND
- Pin 3 (SDA1) connects to SDA
- Pin 5(SCL1) connects to SCL
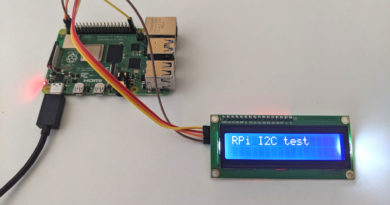
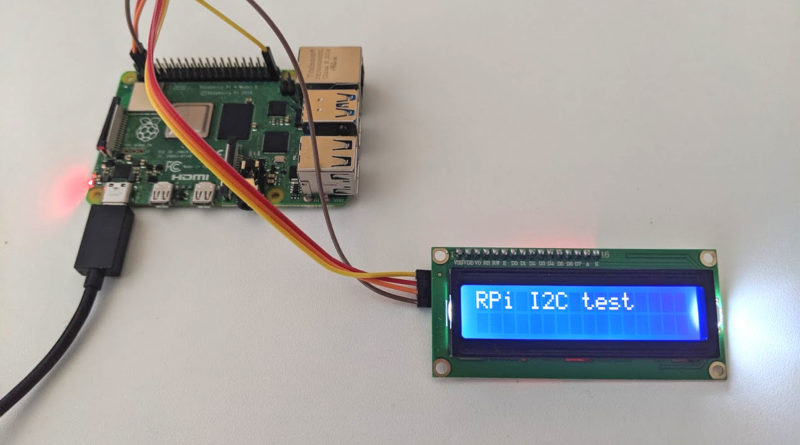
If successfully, you should the LCD should be powered on:
Downloading the Library
To send text to the I2C LCD you will need to download a library. You can do this by running the following command in a terminal:
git clone https://gist.github.com/898c897805bccccbea40b7f2d660260b.git i2c_lcd_driverThanks to Denis Pleic for this awesome library!
You should now have a folder named i2c_lcd_driver. Navigate to this folder using the following command:
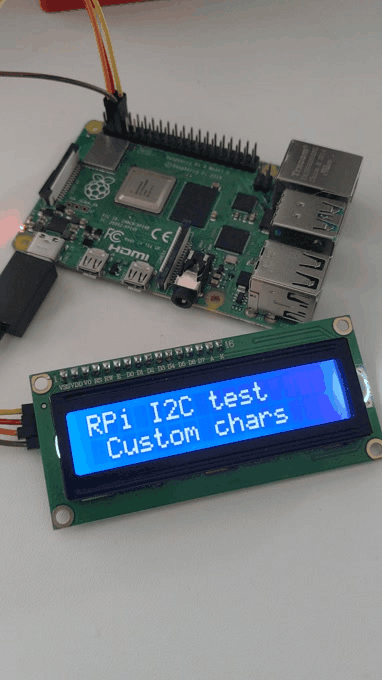
cd i2c_lcd_driverInside this folder there are 2 files: examples.py and RPi_I2C_driver.py. To test that everything is working correctly run examples.py using the following command:
python examples.pyYou should now see some text and customer characters on your screen!
Now, experiment with modifying the examples.py file. For example
mylcd.lcd_display_string_pos("RaspberryPiLife",1,1)This line of code will write “RaspberryPiLife” to the LCD on the first column of the first line.